
Low Tension 4c Hairstyles That Keep Your Edges Happy
Tight styles come with a price. A braid that pulls, a ponytail that aches, a sew-in that tugs at the hairline. At first it just feels snug. Weeks later the edges thin out, bumps show up, and the scalp stays tender after the style comes down.
Low tension 4c hairstyles skip all of that. They hold their shape without pulling at the roots, and they still look finished, because a gentle style does not have to mean a plain one.

Table of Contents
How to Tell a Style Is Truly Low Tension

The test is simple: if it hurts, it is too tight. A good style feels like nothing once in. You should be able to move your eyebrows and smile without feeling a pull at the hairline. If you need painkillers to get through the first night, the style is working against you.
After the install, look at the hairline. The skin should sit flat, with no raised bumps and no rows that look stretched. If the roots feel sore to the touch, the tension is too high, even if the style looks neat.
Watch the edges over the first week. Small bumps, itching that does not quit, or hair coming out at the roots are all signs to loosen or take the style down. A low tension style should feel the same on day seven as on day one.
Loose Two-Strand Twists
Loose twists are the easiest low tension style to start with. Twist two sections of damp, moisturized hair around each other, and stop before the twist feels tight at the root. Each twist hangs from its own weight instead of pulling from the scalp.
Keep the sections chunky. Finger-width twists or wider strain each root less than dozens of tiny ones. Start each twist a little away from the scalp rather than gripping the root.
Wear the twists as the style, or unravel them later for a soft, stretched look. Either way, take them down gently with oiled fingers, one twist at a time. Rushing the takedown pulls out more hair than the style did.

Loose Braids That Hang Free
Loose braids give you the same idea with a smoother finish. Three-strand braids on damp hair, started soft at the root and left to hang, hold for days without tugging.
Skip the feed-in method here. Added hair makes each braid heavier, and heavy braids pull even when the install felt fine. If you want length, clip-ins or a wig will give it with less strain, covered below.
Braid in medium sections and stop a little short of the ends. A small band at the tip holds the braid without pulling the root. At night, gather the braids loosely under a bonnet.

The Low Puff
A low puff sits at the nape instead of the crown, and that lower placement changes everything. The hair gathers where it naturally falls, so the hairline carries almost no load.
Use a wide, soft band or a stretched headband, never a thin elastic. Slide it into place and stop as soon as the hair feels held. If the front feels tight, the band is too far forward. Push it back a finger width and the pull eases off.
Smooth the sides with a brush and a little edge control, then leave the puff alone. Re-smoothing every hour adds friction at the hairline.

Loose Low Bun
A loose low bun is the workday version of the low puff. Gather the hair at the nape, coil it softly, and pin it in place. The bun rests on the back of the head instead of pulling from the front.
Keep the coil loose. A bun wound tight grips the hair it wraps. Coil it once or twice, then pin through the coil. The pins carry the weight, not the hair.
Undo the bun before bed. Sleep with the hair loose under a bonnet, and rebuild the bun in the morning. A bun slept in tightens overnight.

A Wig With the Combs Out
Wigs can be the gentlest option of all, but only if you set them up right. The combs and clips inside most wig caps dig into the hairline and the scalp. Take them out. A wig held by an adjustable strap stays put without a single comb in your hair.
Braid your own hair in a few loose plaits underneath. Keep the base flat and soft, with no tight rows. A satin cap between your hair and the wig cuts friction and keeps the base from drying.
Skip the glue for everyday wear. Glue holds the wig, but it pulls at the hairline every time you take the wig off. A glueless wig with a strap lifts off at night and gives your scalp a full rest.

Clip-Ins for Length Without a Sew-In
A sew-in puts weeks of constant pull on the braids underneath. Clip-ins give you the same length for a day, then come out at night. That on-and-off rhythm is what makes them low tension.
Place the clips on sections with enough hair to hold them, and spread them out instead of stacking them. Two or three wefts at the back and one on each side give full length without loading one spot. Clip to the hair, not the scalp, and keep each clip flat.
Take every clip out before bed. Sleeping in clip-ins bends the clips, tangles the hair, and pulls at the roots all night.

Nighttime Protection That Keeps Tension Off
Night is when low tension styles fail quietly. A tight scarf, a bonnet with a hard band, or hair wrapped drum-tight all pull at the hairline for hours. You wake up with sore edges and blame the style, when the nighttime wrap did the damage.
Use a bonnet with a soft, wide band or a satin scarf tied loosely. The goal is to keep the hair covered and friction low, not to press everything flat. If the band leaves a mark on your forehead, it was too tight.
Gather the hair loosely before it goes under. A loose pineapple, a soft low ponytail, or loose twists all work. The point is to keep the hair from matting without pulling it one way.

Caring for Your Edges Between Styles
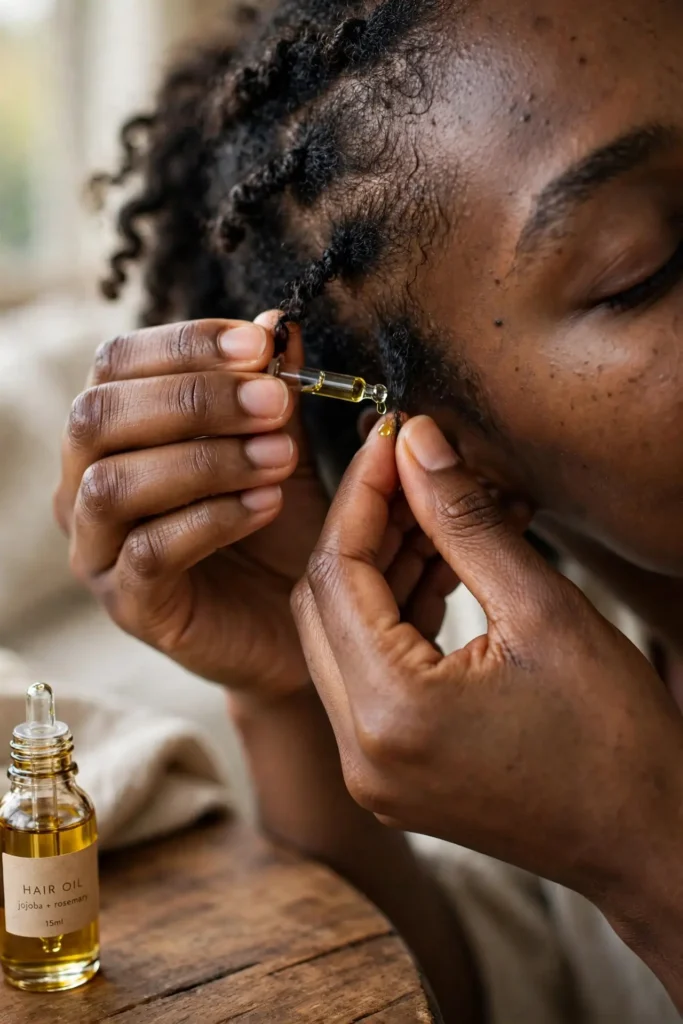
Edges recover slowly, so they deserve a routine of their own. A drop of oil massaged along the hairline a few times a week keeps skin calm and baby hairs soft. Keep the massage light. Rubbing hard breaks the fine hairs you want to protect.
Rest between installs matters as much as the style itself. Give the scalp a few days of loose hair between a braided style and the next one. During the rest, wash gently, moisturize, and let the roots sit free.
Watch for warning signs that mean a style must come down now, not next week. Bumps along the hairline, thinning that shows more scalp, scabs, or pain that does not fade after the first day. Take the style down, leave the hair loose, and wait until the scalp feels calm before installing anything new. Our 4c hairstyles natural article covers texture-first styles that work with your coils, and simple protective hairstyles for natural hair covers low-effort styles that keep the ends tucked away.
The American Academy of Dermatology recommends keeping tension low and handling hair gently to avoid breakage and hairline damage.
Quick Answers

How do I know if a hairstyle is too tight?
Pain, bumps, or itching at the hairline in the first day or two. A style that feels fine at the install can still tighten as it settles, so check again on day two and three.
Are low tension 4c hairstyles good for thin edges?
Yes, they are the safest choice for thin edges. Loose twists, soft puffs, and glueless wigs put almost no pull on the hairline, which gives thinning edges room to recover.
How long can I keep a low tension style in?
About two to four weeks for twists and braids, and a day at a time for clip-ins and wigs. Take any style down early if the hairline gets sore.
Can I wash low tension 4c hairstyles?
Yes. Wash with diluted shampoo pressed along the parts, rinse well, and dry fully before covering. Loose styles dry faster than tight ones.
Should I rest between installs?
Yes. A few days of loose hair between styles lets the scalp recover. Skip the rest and the next install starts on a tender scalp.
One Last Note Before You Book

Tell your stylist the style has to stay pain-free. Those words set the tension for the whole install.
Low tension 4c hairstyles give you the look without the ache. Pick one that fits your week, and let your edges enjoy the break.





Pingback: Natural Gray Hair Over 50 Black Women: 8 Silver Styles That Flatter